Hi there, I hope you're having a great weekend!
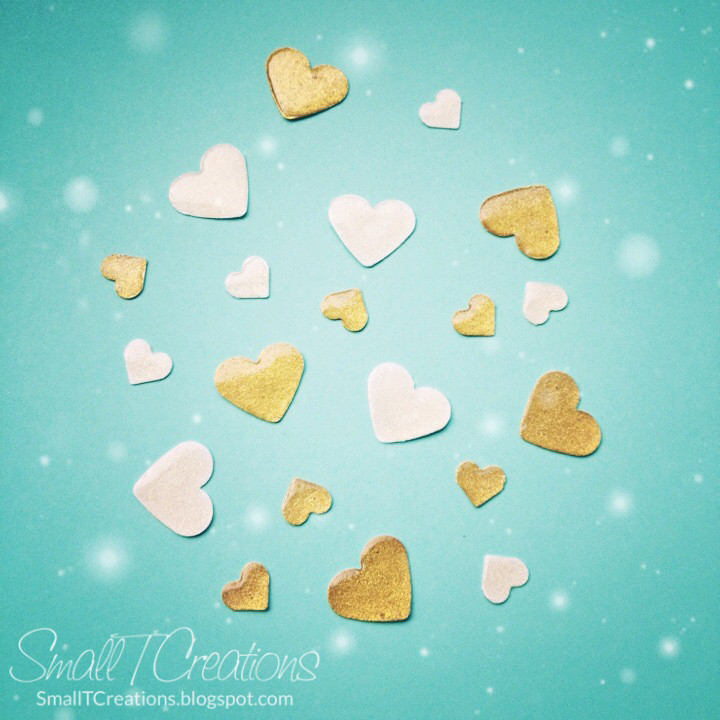
So here it is finally, my DIY Tutorial for the Glitter Enamel Hearts I used on this card. :-)
Step-by-step Tutorial
1. Punch out or die cut your hearts from white card stock. You can use this and this punch.
2. Color your hearts gold with this amazing gold ink. Use this very handy tool to pick up your little hearts.
3. Take a moment to admire your pretty golden hearts. :-)
4. Add some Wink of Stella for extra sparkle. You can skip this step, because the hearts turn out really beautiful with only the gold ink as well.
5. Apply a thick layer of Glossy Accents to make your hearts shiny and dimensional.
6. Wait for the Glossy Accents to dry. When the hearts are clear, they are done!
White Glitter Enamel Hearts
To make white glitter enamel hearts, skip the gold ink and only add the Wink of Stella to your white hearts. Magic happens when Glossy Accents is applied over the Wink of Stella. The glitter and sparkle is so pretty!
I hope you enjoyed this tutorial, and that you try to make some glitter enamel hearts as well! :-) And if you do, I would love to see your projects, so leave me a link or tag me on social media.
Hugs,
Tone
Let's connect on Instagram, Facebook, Pinterest and Twitter.
Follow me via Feedly, Bloglovin' or e-mail for all the latest updates.
Visit my Etsy shop HERE.
Showing posts with label Wedding. Show all posts
Sunday, November 16, 2014
Monday, October 6, 2014
Gold Wedding Card
Hello crafty friends!
The gold wedding card that I mentioned in my Creative Blog Hop post is now finished. I think it's gorgeous, and it has five different gold elements!
To make the gold background, I first used this gold spray on Papertrey Ink's Rustic Cream Cardstock and later stamped the flourishes from this Hero Arts stamp set in this gorgeous gold ink.
I used the same gold ink with this beautiful script background from Hero Arts to make the second layer.
The sentiment is from Papertrey Ink (love that font!) and is heat embossed with this gold embossing powder. To frame the sentiment, I added a layer under it with gold glitter.
Lastly, I embellished the card with gold glitter enamel hearts that I made myself. My next post will be a tutorial on how you can make these hearts yourself, so stay tuned!
Thank you for joining me today!
Hugs,
Tone
Challenges: Simon Says Monday Challenge: Falling in love with (gold), Virginia's View Challenge #8: Clean & Simple, Ett Trykk Trykkpressa Oktober: Hjerter, Studio Calico WCMD Challenge #9: Gold
Let's connect on Instagram, Pinterest, Facebook and Twitter.
Follow me via Feedly, Bloglovin' or e-mail for all the latest updates.
Supplies
(I'm trying out a new way to list supplies. Hover over the image, and you can even click the tags.)
The gold wedding card that I mentioned in my Creative Blog Hop post is now finished. I think it's gorgeous, and it has five different gold elements!
To make the gold background, I first used this gold spray on Papertrey Ink's Rustic Cream Cardstock and later stamped the flourishes from this Hero Arts stamp set in this gorgeous gold ink.
I used the same gold ink with this beautiful script background from Hero Arts to make the second layer.
The sentiment is from Papertrey Ink (love that font!) and is heat embossed with this gold embossing powder. To frame the sentiment, I added a layer under it with gold glitter.
Lastly, I embellished the card with gold glitter enamel hearts that I made myself. My next post will be a tutorial on how you can make these hearts yourself, so stay tuned!
![]() |
| DIY Glitter Enamel Hearts Tutorial - Coming Soon |
Thank you for joining me today!
Hugs,
Tone
Challenges: Simon Says Monday Challenge: Falling in love with (gold), Virginia's View Challenge #8: Clean & Simple, Ett Trykk Trykkpressa Oktober: Hjerter, Studio Calico WCMD Challenge #9: Gold
Let's connect on Instagram, Pinterest, Facebook and Twitter.
Follow me via Feedly, Bloglovin' or e-mail for all the latest updates.
Supplies
(I'm trying out a new way to list supplies. Hover over the image, and you can even click the tags.)
Wednesday, February 27, 2013
Elegant Anniversary Card
Hello hello!
Today's card was for a colleague of mine. He wanted to give his wife a special card for their anniversary, and they both really liked the card I made! :-)
This is a larger card: 5.5 by 8.5 inches (one piece of card stock folded in half). I first stamped and heat embossed the Heart Flourish several times, then stamped the script in white over it and distressed the edges with white. The butterflies are stamped in Dusty Concord Distress Ink and embossed with clear embossing powder. The sentiment is stamped in Versafine Smokey Gray and also clear embossed. Lastly, I added all the pieces to the stamped panel and adhered that to the card front.
Here is a close up for you, so you can see the lovely dimension of the butterflies better.
Thank you so much for visiting! :-)
Have a wonderful day!
Love,
Tone
Challenges: Hero Arts: Love & Lace, Simon Says: Anything Goes.
Supplies
Today's card was for a colleague of mine. He wanted to give his wife a special card for their anniversary, and they both really liked the card I made! :-)
This is a larger card: 5.5 by 8.5 inches (one piece of card stock folded in half). I first stamped and heat embossed the Heart Flourish several times, then stamped the script in white over it and distressed the edges with white. The butterflies are stamped in Dusty Concord Distress Ink and embossed with clear embossing powder. The sentiment is stamped in Versafine Smokey Gray and also clear embossed. Lastly, I added all the pieces to the stamped panel and adhered that to the card front.
Here is a close up for you, so you can see the lovely dimension of the butterflies better.
Thank you so much for visiting! :-)
Have a wonderful day!
Love,
Tone
Challenges: Hero Arts: Love & Lace, Simon Says: Anything Goes.
Supplies
Tuesday, January 8, 2013
Wedding Card
Hi there!
Today I'm sharing a wedding card I made for a friend who just got married.
There are three challenges right now about using something new. The Starburst Lace stamp is new for me. I finally got it! It's perfect for wedding cards, I think.
I also tried a new card size. The card is 8.5 by 4.25 inches, so it fits perfectly inside a business envelope.
Tomorrow I have some super exciting news to share with you! Did someone say Giveaway... ;-)
Have a wonderful day, and don't forget to check back tomorrow!
Love,
Tone
Supplies:
Today I'm sharing a wedding card I made for a friend who just got married.
There are three challenges right now about using something new. The Starburst Lace stamp is new for me. I finally got it! It's perfect for wedding cards, I think.
I also tried a new card size. The card is 8.5 by 4.25 inches, so it fits perfectly inside a business envelope.
Tomorrow I have some super exciting news to share with you! Did someone say Giveaway... ;-)
Have a wonderful day, and don't forget to check back tomorrow!
Love,
Tone
Supplies:
Sunday, June 12, 2011
Wedding card
This is my second post for today, please scroll down for the first!
A colleague of mine got married this Friday, and I made this card for the happy couple.
This card is bigger than a standard size card. The background was created by stamping two stamps from the Speckled Ornaments set and the Envelope Pattern in Soft Sand ink. The edges are distressed with Antique Linen and Vintage Photo. The sentiment is stamped in Vintage Photo. I stamped the Fabulous Flourish in VersaMark on the kraft card stock and white embossed. I stamped the Envelope Pattern on the kraft as well for some texture, as well as distressing the edges with Vintage Photo. I matted on a white piece of card stock to match the white embossing, tied a ribbon around and attached to the card with pop dots.
It took a very long time to make, but I'm very happy with how it turned out! :-)
Supplies
Stamps: Hero Arts S5449 Fabulous Flourish, S5507 Envelope Pattern, CL401 Speckled Ornaments, CL342 Everyday Sayings
Ink: VersaMark, Hero Arts Soft Sand, Distress Ink Antique Linen and Vintage Photo
Card stock: Hero Arts Eggshell Layering Paper and Kraft
Other: Pop dots, White embossing powder, Pop dots
A colleague of mine got married this Friday, and I made this card for the happy couple.
This card is bigger than a standard size card. The background was created by stamping two stamps from the Speckled Ornaments set and the Envelope Pattern in Soft Sand ink. The edges are distressed with Antique Linen and Vintage Photo. The sentiment is stamped in Vintage Photo. I stamped the Fabulous Flourish in VersaMark on the kraft card stock and white embossed. I stamped the Envelope Pattern on the kraft as well for some texture, as well as distressing the edges with Vintage Photo. I matted on a white piece of card stock to match the white embossing, tied a ribbon around and attached to the card with pop dots.
It took a very long time to make, but I'm very happy with how it turned out! :-)
Supplies
Stamps: Hero Arts S5449 Fabulous Flourish, S5507 Envelope Pattern, CL401 Speckled Ornaments, CL342 Everyday Sayings
Ink: VersaMark, Hero Arts Soft Sand, Distress Ink Antique Linen and Vintage Photo
Card stock: Hero Arts Eggshell Layering Paper and Kraft
Other: Pop dots, White embossing powder, Pop dots
Subscribe to:
Posts
(
Atom
)

.jpg)


.jpg)
.jpg)

.jpg)
.jpg)
.jpg)